The Infra
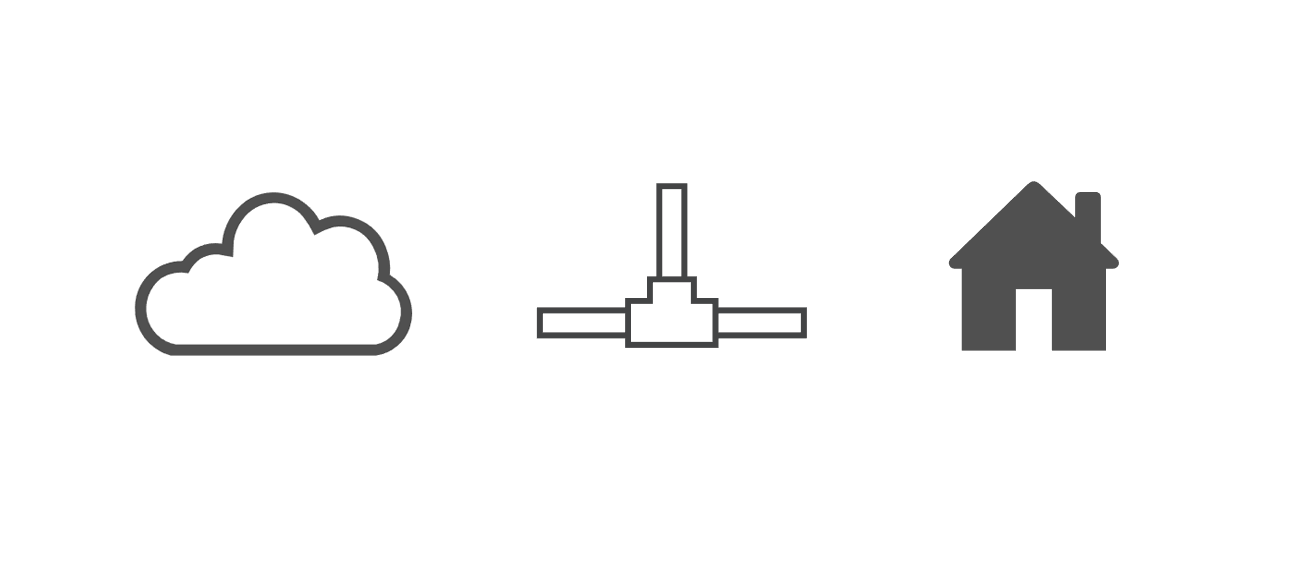
After the dense stream of consciousness that was my last post, I’d like to spend the next few posts giving you a brief overview of the elements that make up my current homelab. Seeing as there is a lot to cover from each of those elements, I’ll try to break the overview into several more manageable chunks instead of a single all-encompassing wall of text. To start us off, here’s a refresher on the logical diagram of my lab:
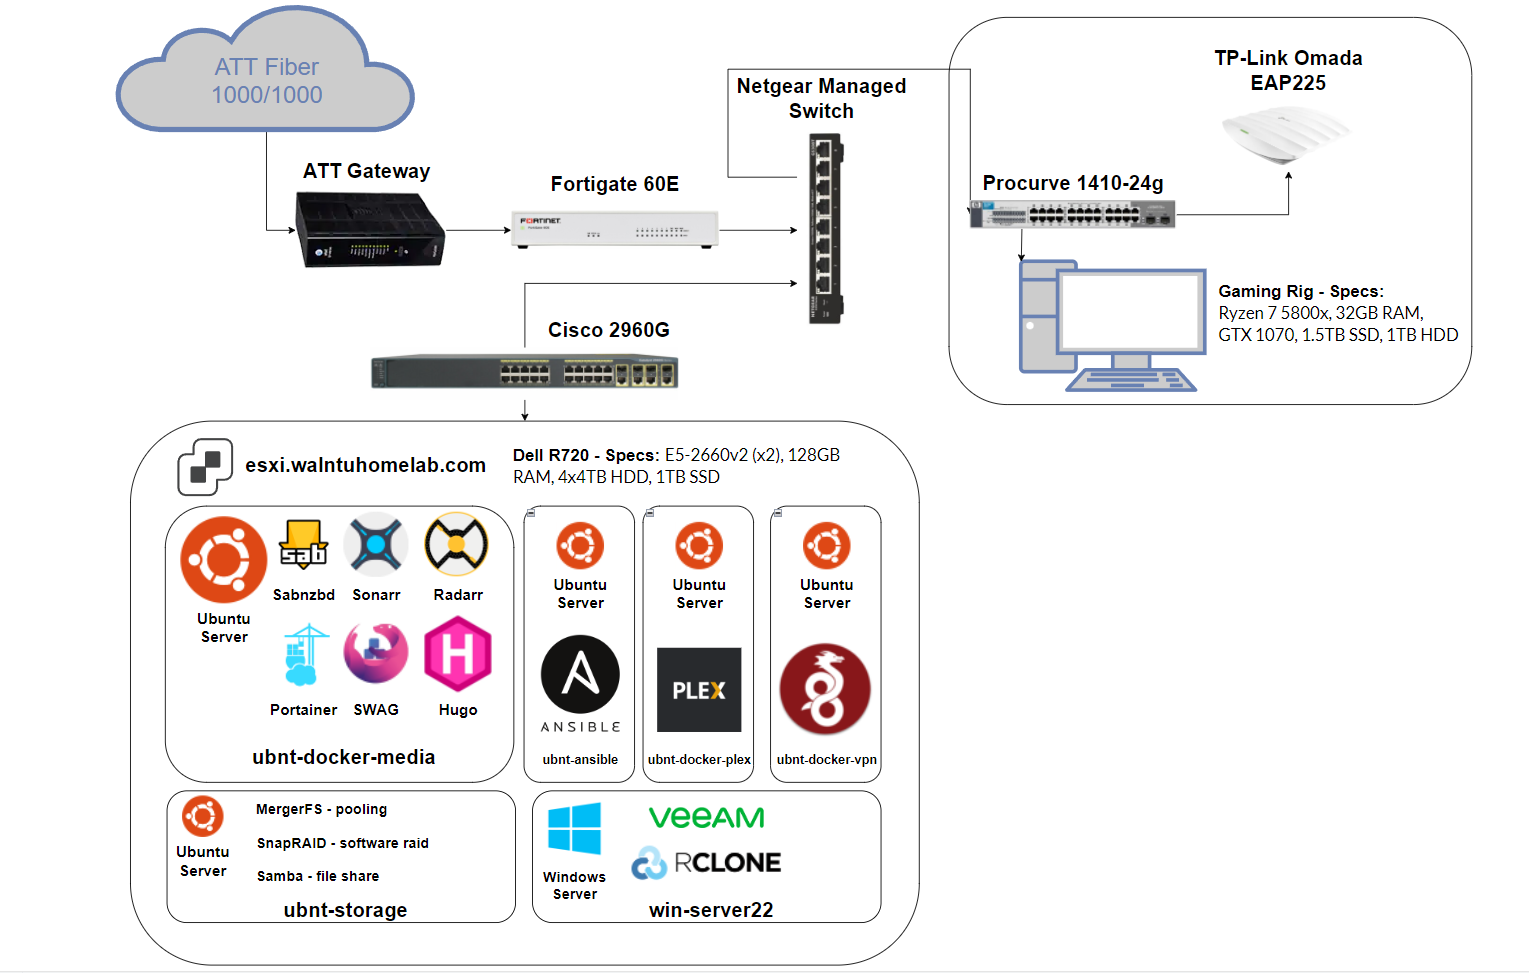
Today we’ll mostly be covering the top left corner, which is all my cabling and networking gear.
Punching Down
Note to self, buy a nicer punch down tool next time I decide to terminate a bunch of cables.
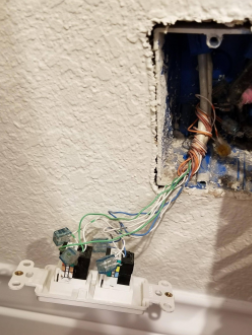
Starting at the top, I receive a gigabit (1000 up/down) fiber connection from my ISP. I know the next two immediate points on the diagram are the ATT gateway and the Fortigate firewall, but first I’d like to cover the cabling/infrastructure. Like many home fiber links, the connection terminates at an Optical Network Terminal (ONT) in the communications box on the side of the house, which then outputs to ethernet cabling. Unfortunately, dear reader, this is where we encounter our first turn for the worse. While my previous house was wired with ethernet drops in every room of the house, my current abode’s wiring was essentially a series of daisy-chained phone lines. It sort of looks like this when you pull a plate off the wall and look inside:
Not ideal. We had the ATT cable tech set up the gateway in the only spot that could get a full gigabit connection with consideration for the available wiring, which was in the kitchen. From there, I knew I would need to make some cable runs to get that gigabit connection to my desired locations. To try and give you a visualization, I painstakingly recreated a hyper-accurate scale model of my cabling:
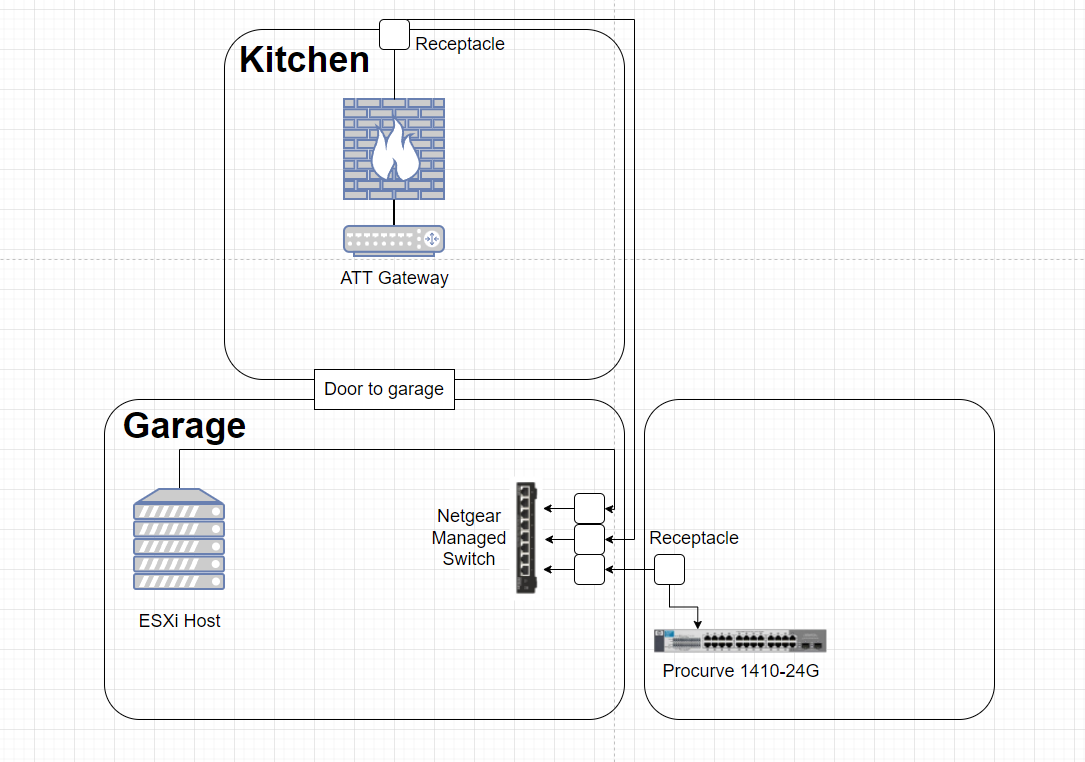
From the gateway’s location in the kitchen, I made an external cable run that terminates on the interior side to a receptacle. It then goes directly through the outside-facing wall and loops around the house and enters the garage through a hole that was previously drilled for coaxial cable. From there, it punches down into a keystone jack, which then slides into a cute little surface mounted box. I repeated this same process for the room directly above the garage; into a receptacle, out through the wall, in through the existing hole in the garage wall, and into a keystone jack. I then repeated the process a third time, but this time it was just an internal run from one side of the garage to the other (to get a connection to my server rack), terminating into a keystone jack on each end. From all three of the adjacent keystone jacks, I connected a short patch cable to a Netgear managed switch I had bought a year ago and never unboxed. The final result ended up looking like this:

I would say I’m reasonably happy with the overall outcome of this cabling project, I completed the entire thing start to finish in a day. It was a grueling 10 hour long day, because I’m not very experienced with making successful punch downs, and because I had to make one or two runs to the local Home Depot to get more stuff as I ran out. In hindsight, maybe a patch panel would have been the better route, but honestly I don’t see myself doing anymore ethernet runs as this handles all of my devices, and everyone else is perfectly happy on wireless.
Routing and Switching
So now that we’ve covered the core infrastructure that supplies packets to all the various locations, we can briefly cover what devices I have that pass those packets along.
Routing

We can finally address the aforementioned Fortigate! It’s technically a FortiWifi, but I’m not using the wireless radios and it’s essentially the exact same product as a Fortigate 60E otherwise, so I’ll continue referring to it as such. I actually picked this thing up from e-waste at my first help desk job. We had a client returning some equipment (it was an MSP) and the Fortigate wasn’t part of the equipment we sold them, but they said we could either take it or they’d throw it away, so I called dibs. After locating some firmware (you need a license/support agreement with Fortinet to gain access to firmware downloads, so shoutout to the friendly Redditor on the r/sysadmins Discord), and getting it updated I eventually managed to place it between my ATT gateway and the rest of my network by placing the ATT gateway in passthrough mode. This essentially hands off the WAN address to another device so that device can manage all of your traffic. I plan to elaborate on this handoff process and write up a guide in a future post.
Switching
From our little garage switch, we split off into two different locations: the guest room upstairs where I do my gaming/labbing, and the other side of the garage where my server “rack” is located. You’ll see why I quoted that in my next post ;)

Upstairs, the patch cable coming from the wall receptacle plugs into a ProCurve 1410-24G (which I also acquired from the e-waste bin at my first job). These things are quiet, fanless, gigabit, and just get the job done. Unfortunately, they are dumb switches, which means no VLANs for me just yet. My plan is to eventually replace this thing with its older brother, the 1810-24G, which is basically the same switch but with some management capabilities and VLAN tagging.

In the garage, the patch cable coming from the surface mounted box plugs into a Cisco 2960G; everything in the rack plugs into this switch at the moment. This bad boy is a pretty powerful managed switch, at least for the $36 I paid for it off eBay two years ago. I’ve been using it in dumb switch mode, and haven’t reset it back to factory defaults once in the time I’ve had it, so that’s on the list of things to do.
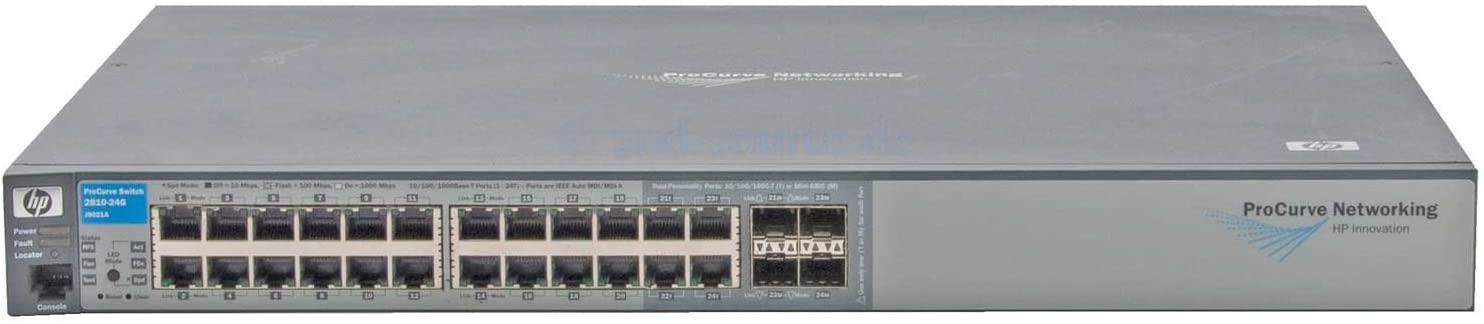
I’m also in possession of a ProCurve 2810-24G (which I also acquired from - you guessed it - the e-waste bin). This switch. Is. LOUD. I know, I know, this is enterprise equipment, designed for network closets and datacenters. Even so, the fans on this thing have an oddly pitched resonance with the chassis that makes it sing the song of its people loud enough for you to hear it in the next room over. It will boot and function fine with the fans unplugged, but I’ll have to do a bit more testing under some load before I’m confident it won’t overheat or throw errors. I actually did factory reset this one, so I have access to the management interfaces in the event that I decide to use it at some point.
Bill Wi the Science Fi
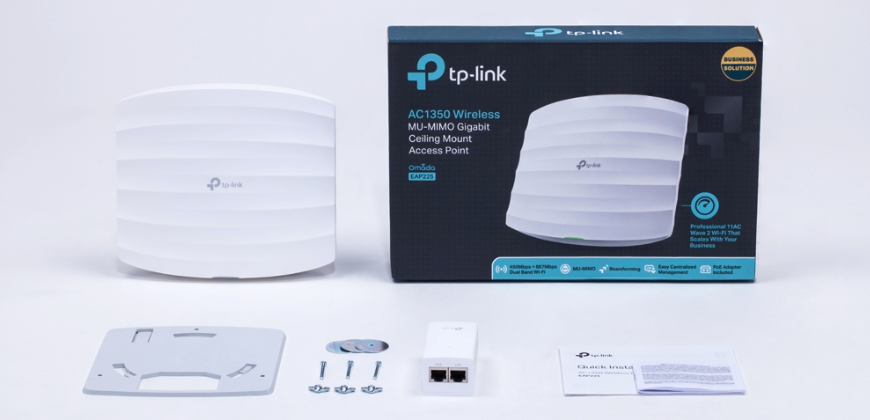
I had to use at least one pun in this post, don’t hate me too much. My current wireless solution is pretty simple; I have a single TP-Link Omada EAP 225 plugged into my switch upstairs, managed via the Omada Controller in Docker container form. It’s providing better and more stable internet than the provided ATT gateway radio with next to no additional modification. And it’s not even mounted on a wall yet! Eventually, I’d like to set up a guest network and of course play with VLANs to segregate the streaming/mobile/IOT devices away from the computers and servers.
Wrap Up
And there you have it, that’s my current cabling and network infrastructure, and a little bit of what I plan to do next. I’m trying to avoid these posts getting too long in the tooth, so we’ll cap this one off here. In my next one, I’ll be covering the process of setting up my server, both on the hardware and software sides.